Installing OpenVPN on Ubuntu
There are a few reasons why it’s worth it to not only install OpenVPN through CLI but also the systemd-resolved and Network Manager plugin, mostly if you want the clients to be able to resolve internal domain names.
If you’ve previously disabled or uninstalled the network manager you’ll need to do the following:
First backup the network interfaces file
$ mv /etc/network/interfaces /etc/network/interfaces.old
$ mv /etc/resolv.conf /etc/resolv.conf.old
And then re-install Network Manager and the PlasmaNM widget, along with re-enabling systemd-resolved
$ apt-get install network-manager plasmanm
$ systemctl enable systemd-resolved
$ systemctl restart systemd-resolved
After this you’ll need to restart the computer.
Now you can install OpenVPN and it’s plugins
$ apt-get update
$ apt-get install openvpn openvpn-systemd-resolved network-manager-openvpn -y
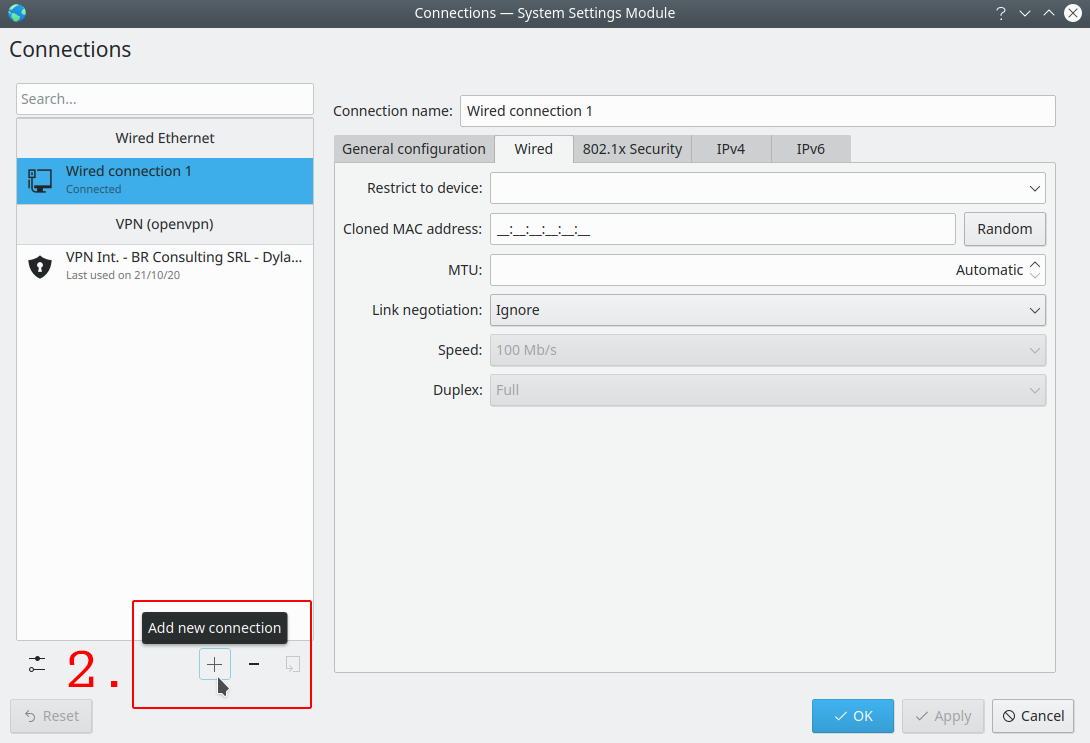
Once you’ve installed the requirements go to the Network Manager widget and click on the settings button

Click on “Add new connection”
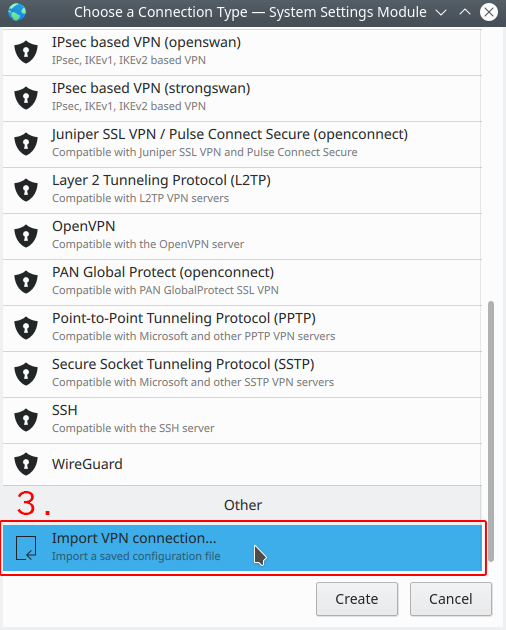
At the bottom click “Import VPN Connection…”
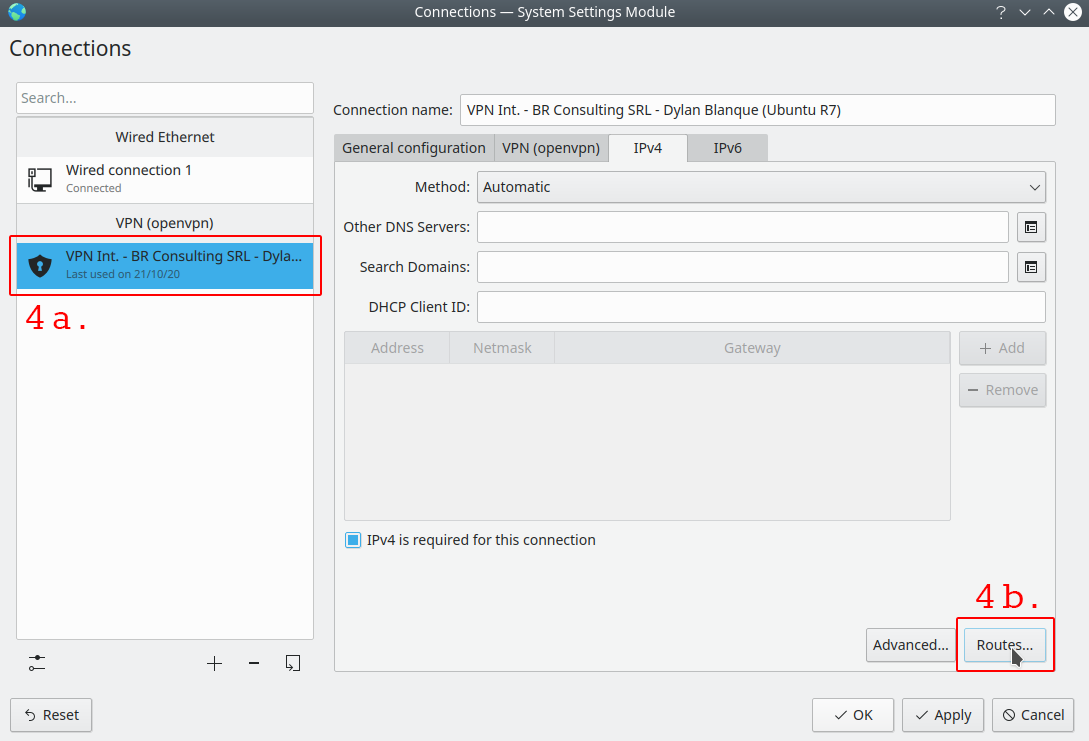
Once you’ve done that click on the .ovpn file’s connection you’ve imported and click on “Routes”
Activate the toggle for “Use only for resources on this connection”
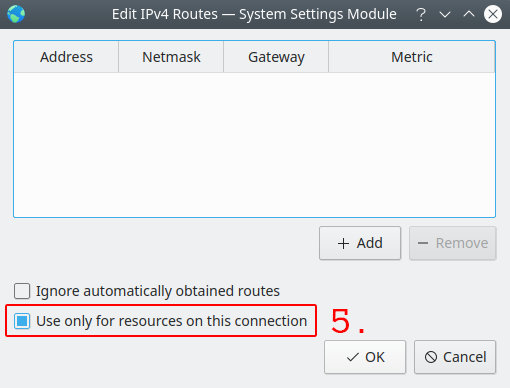
Done!
You can now activate the VPN by clicking on “Connect” on the corresponding connection in the Network Manager Widget.